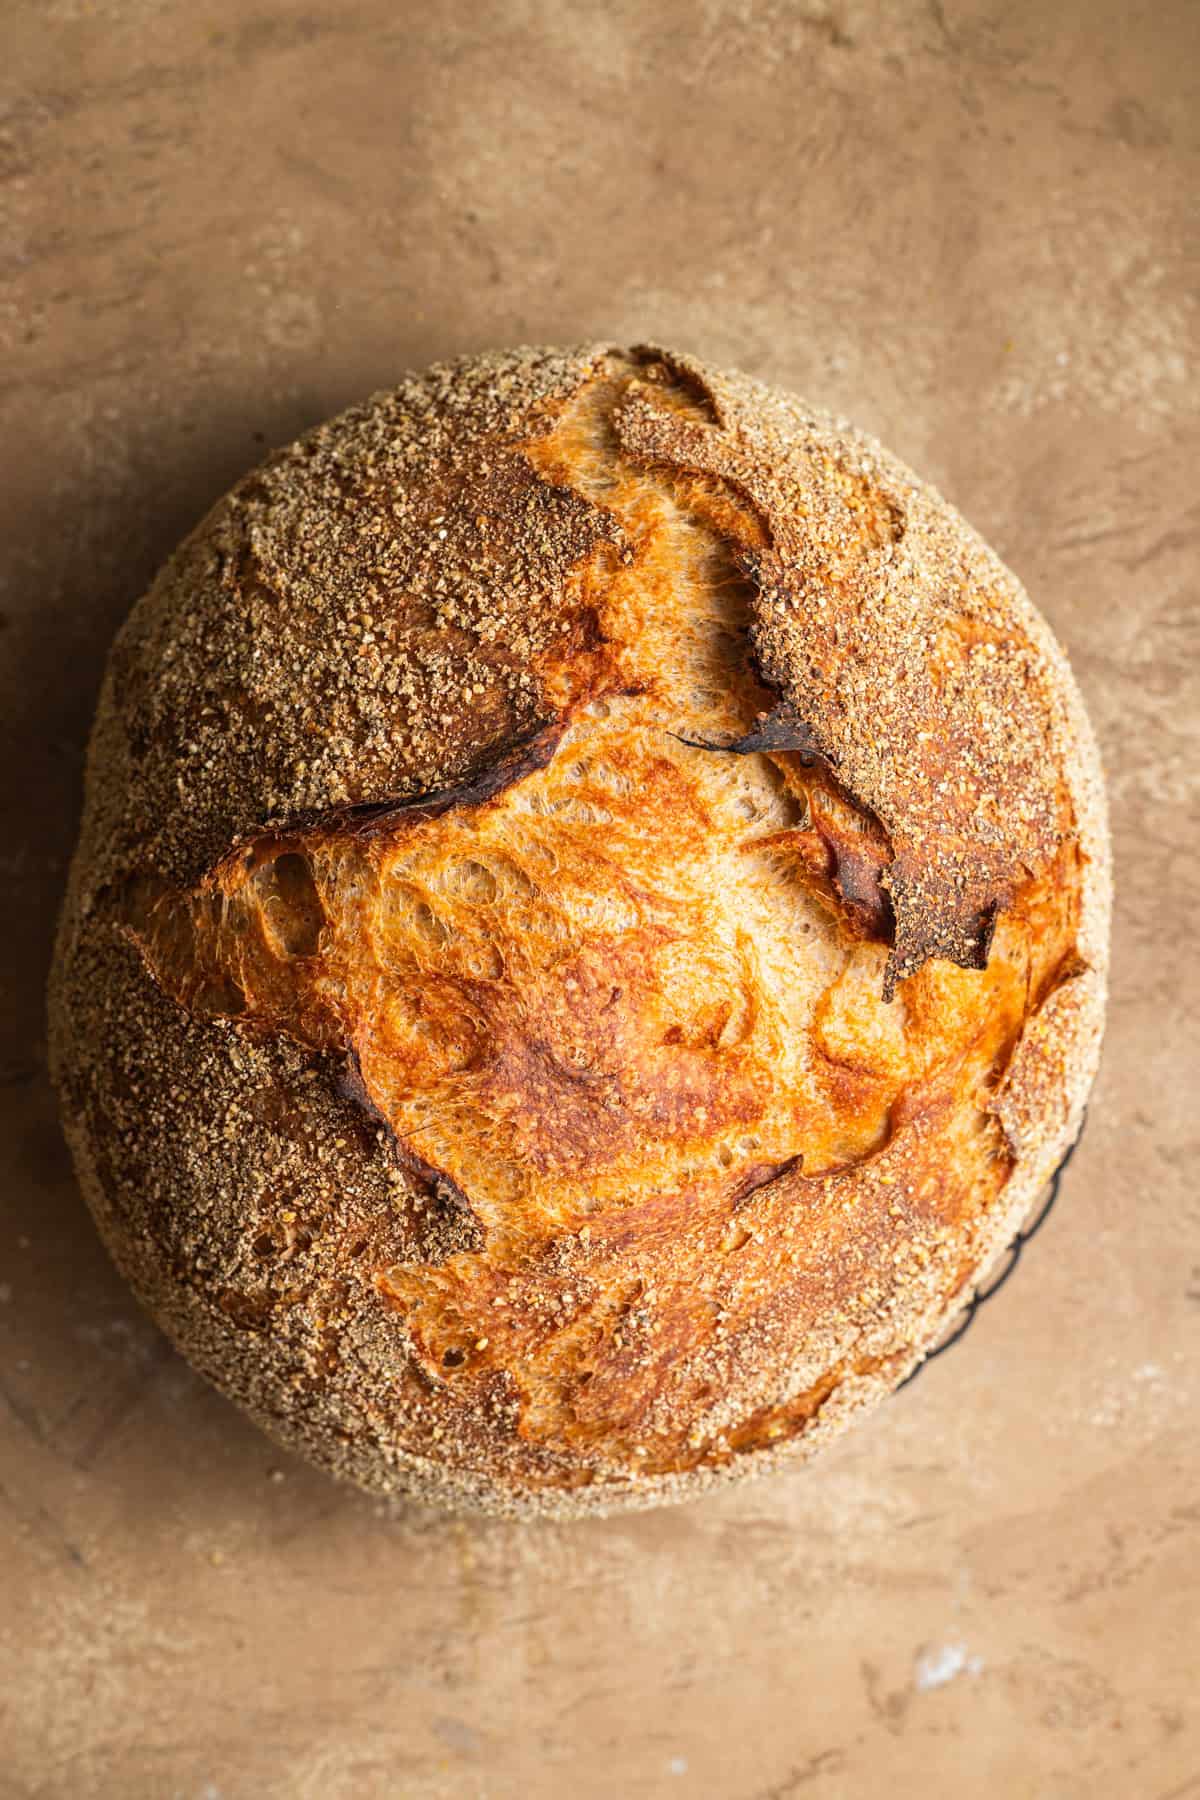
Homemade bread doesn’t have to be complicated to be delicious! This whole-wheat dutch oven bread is made with a 50/50 blend of whole wheat flour and bread flour, delivering a mild, nutty flavor with a moist interior and a crusty exterior. Adapted from Jim Lahey’s popular no-knead recipe, the dough develops most of its structure during an overnight rise, without the need for additional kneading. To make the dough easy to work with, I add a set of stretch-and-folds while staying true to the original recipe’s simplicity.

There is nothing better than a warm loaf of good bread straight from the oven, the sound of the soft crackle of the crust permanently affixed in my memory. And while I love a full-on project, like my fluffy focaccia, brioche dinner rolls, or cold-fermented pizza dough, sometimes you want something a little more hands-off.
Enter this tasty whole wheat bread! It’s based on Jim Lahey’s no-knead recipe but with a few changes to make the process even smoother. The result is a lovely, tall loaf of crusty bread with a super-soft interior (thanks to a high-hydration dough!), perfect for sandwiches, soups, and tartines.
👩🏽🍳 Recipe Lowdown
key details before we dive into the cooking!
- Why You’ll Love it: Enjoy this hands-off, no-knead pantry recipe with just four ingredients! I tweaked Jim Lahey’s original recipe to include a set of stretch-and-folds (don’t worry, it’s very easy!) so it’s less messy to work with and yields a more structured, taller loaf.
- Prep: You’ll mix the ingredients, then perform a few stretch-and-folds before letting the dough rest overnight. Proof, bake the next day, and enjoy!
- Equipment: A preheated Dutch oven traps steam and intense heat, creating an ideal environment for maximum oven spring and a crisp, artisan-style crust.
Ingredient Notes
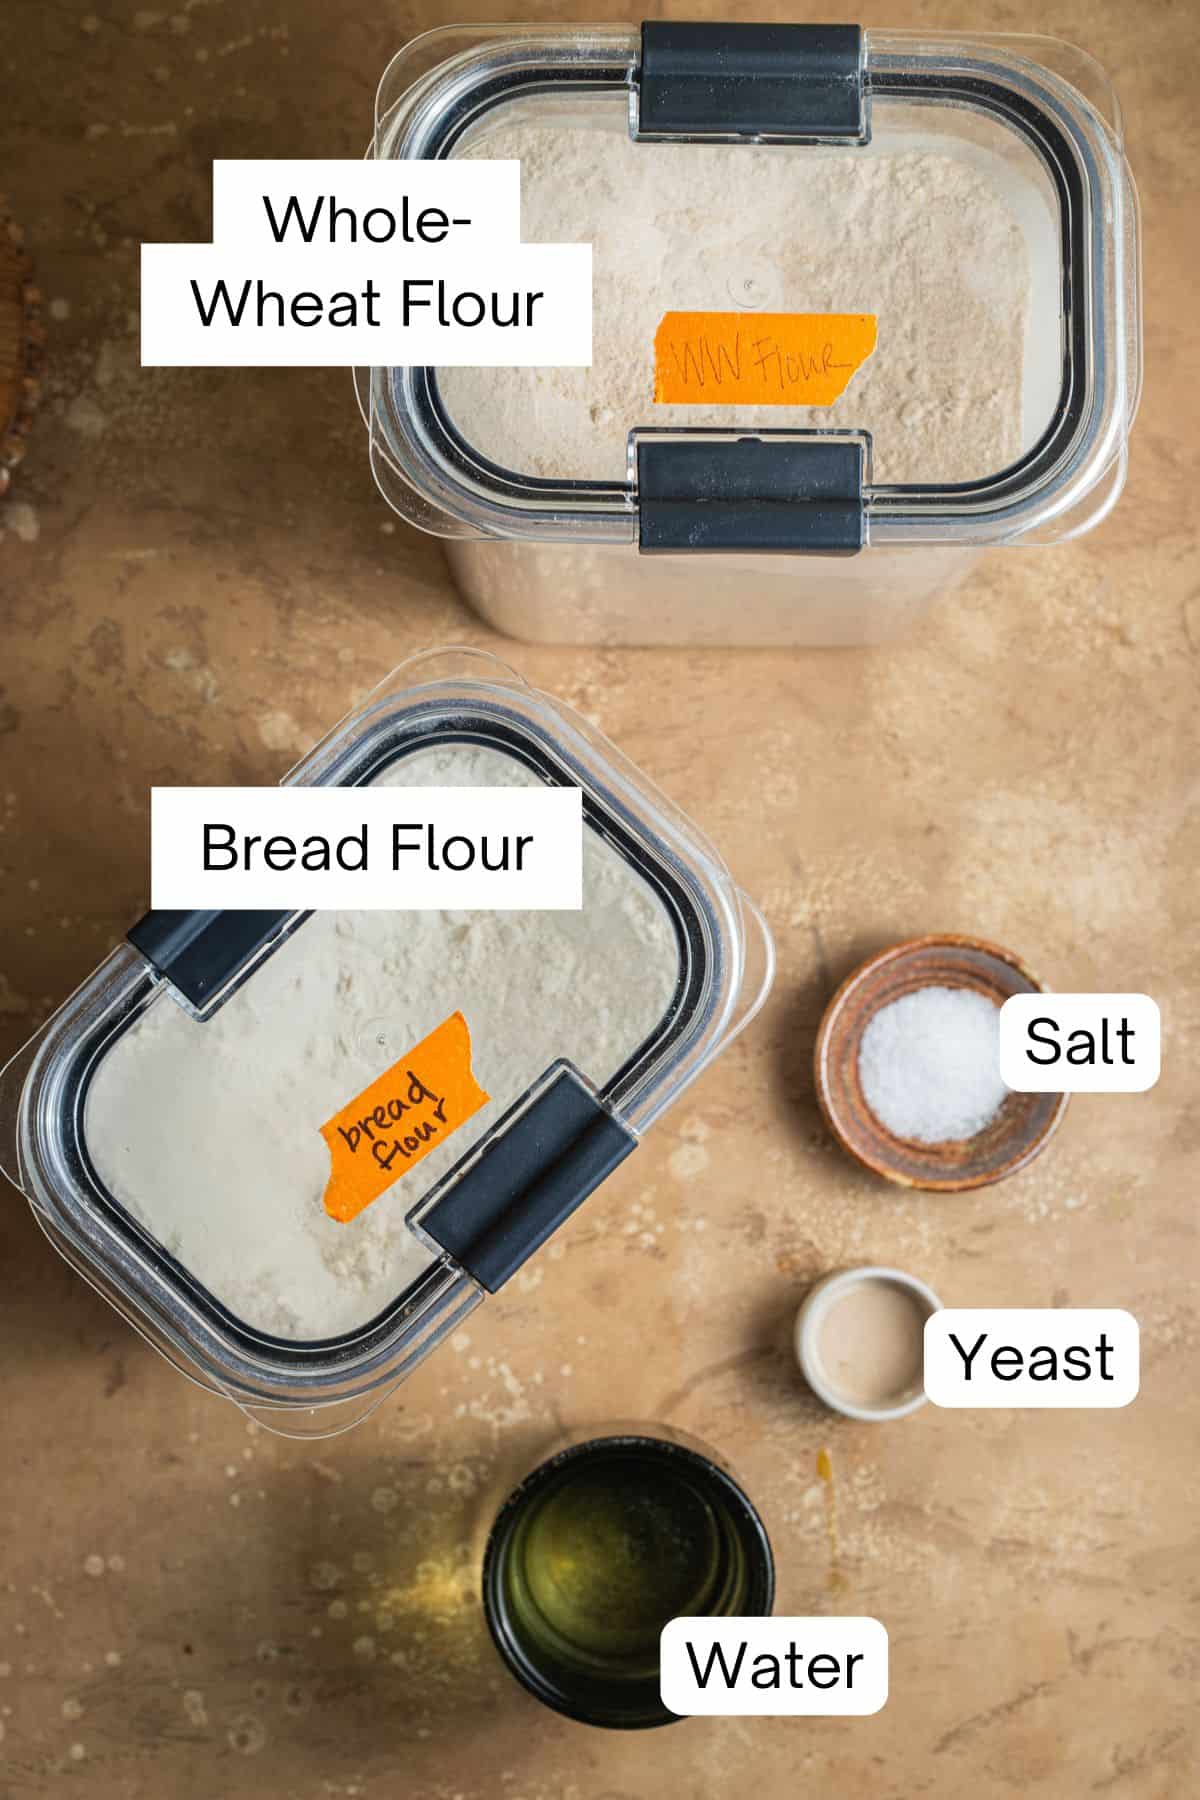
- Flour: Bread flour has a higher protein content, which promotes better gluten formation; whole-wheat flour creates a denser matrix, so the combination of the two ensures a lovely oven-spring with good structure.
- Yeast: Because of the long fermentation time, a little bit of yeast goes a long way.
For more details on bread flour’s properties, check out my post on bread flour vs. all-purpose vs. 00 flour.
For a full list of ingredients and their quantities, please refer to the recipe card.
How to Make This Recipe
Make the Dough:
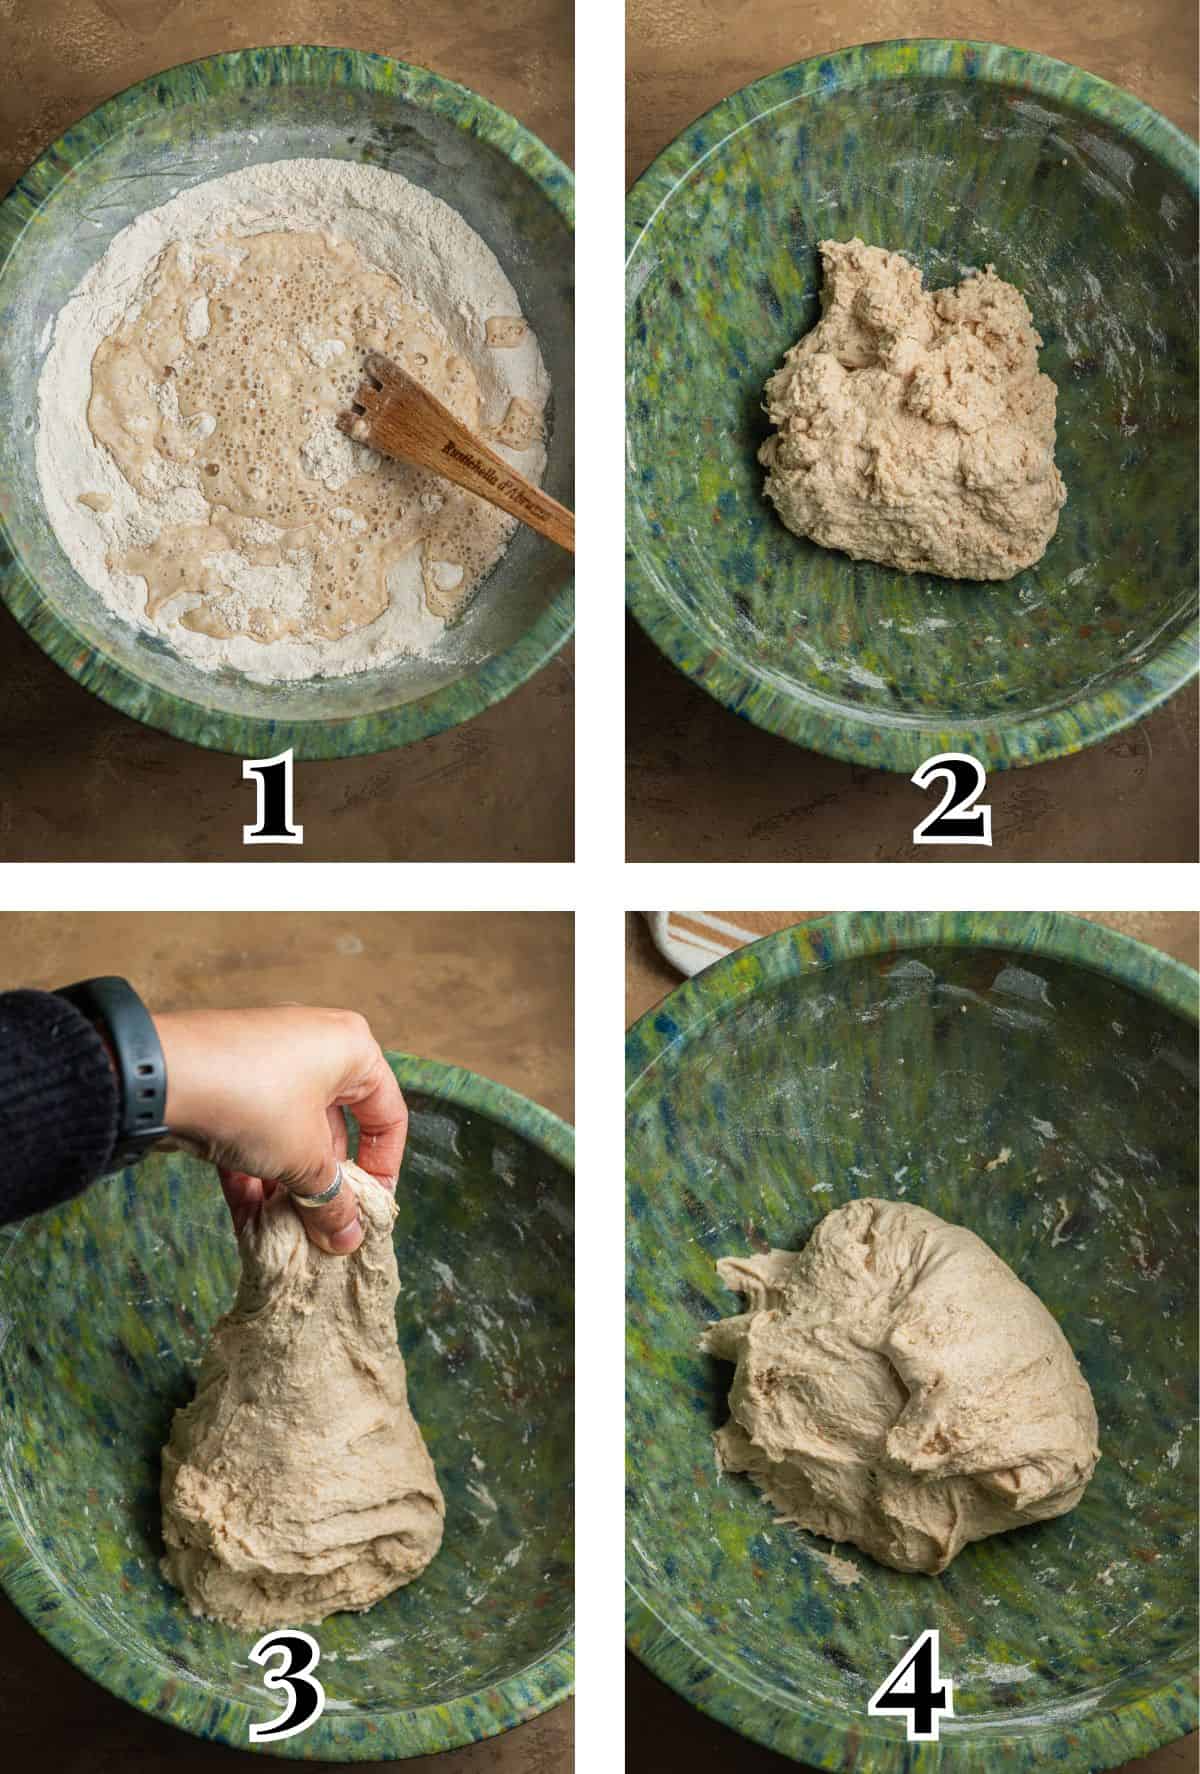
In a large bowl, combine the dry ingredients (flours, salt, and instant yeast). Form a well in the center, and add the water (Image 1). Mix to form a shaggy dough (Image 2).
Let the dough rest for about 20 minutes; this “autolyse” period allows the flour to hydrate and kickstart gluten formation. Then perform 4 sets of stretch-and-folds, each separated by 5 minutes.
What is a Stretch and Fold?
A stretch-and-fold is a gentle gluten-strengthening technique in which you lift and stretch the dough, then fold it over onto itself. Picture the dough as having four “corners”: stretch one corner up until it feels taut, fold it over, rotate the bowl, and repeat on all four sides to complete one set.
This method replaces intensive kneading by gradually building strength through a series of these rotations and folds.
Cover bowl with plastic wrap and allow dough to proof at room temperature for 12 – 18 hours, or until nicely bubbly.
Proof and Bake:
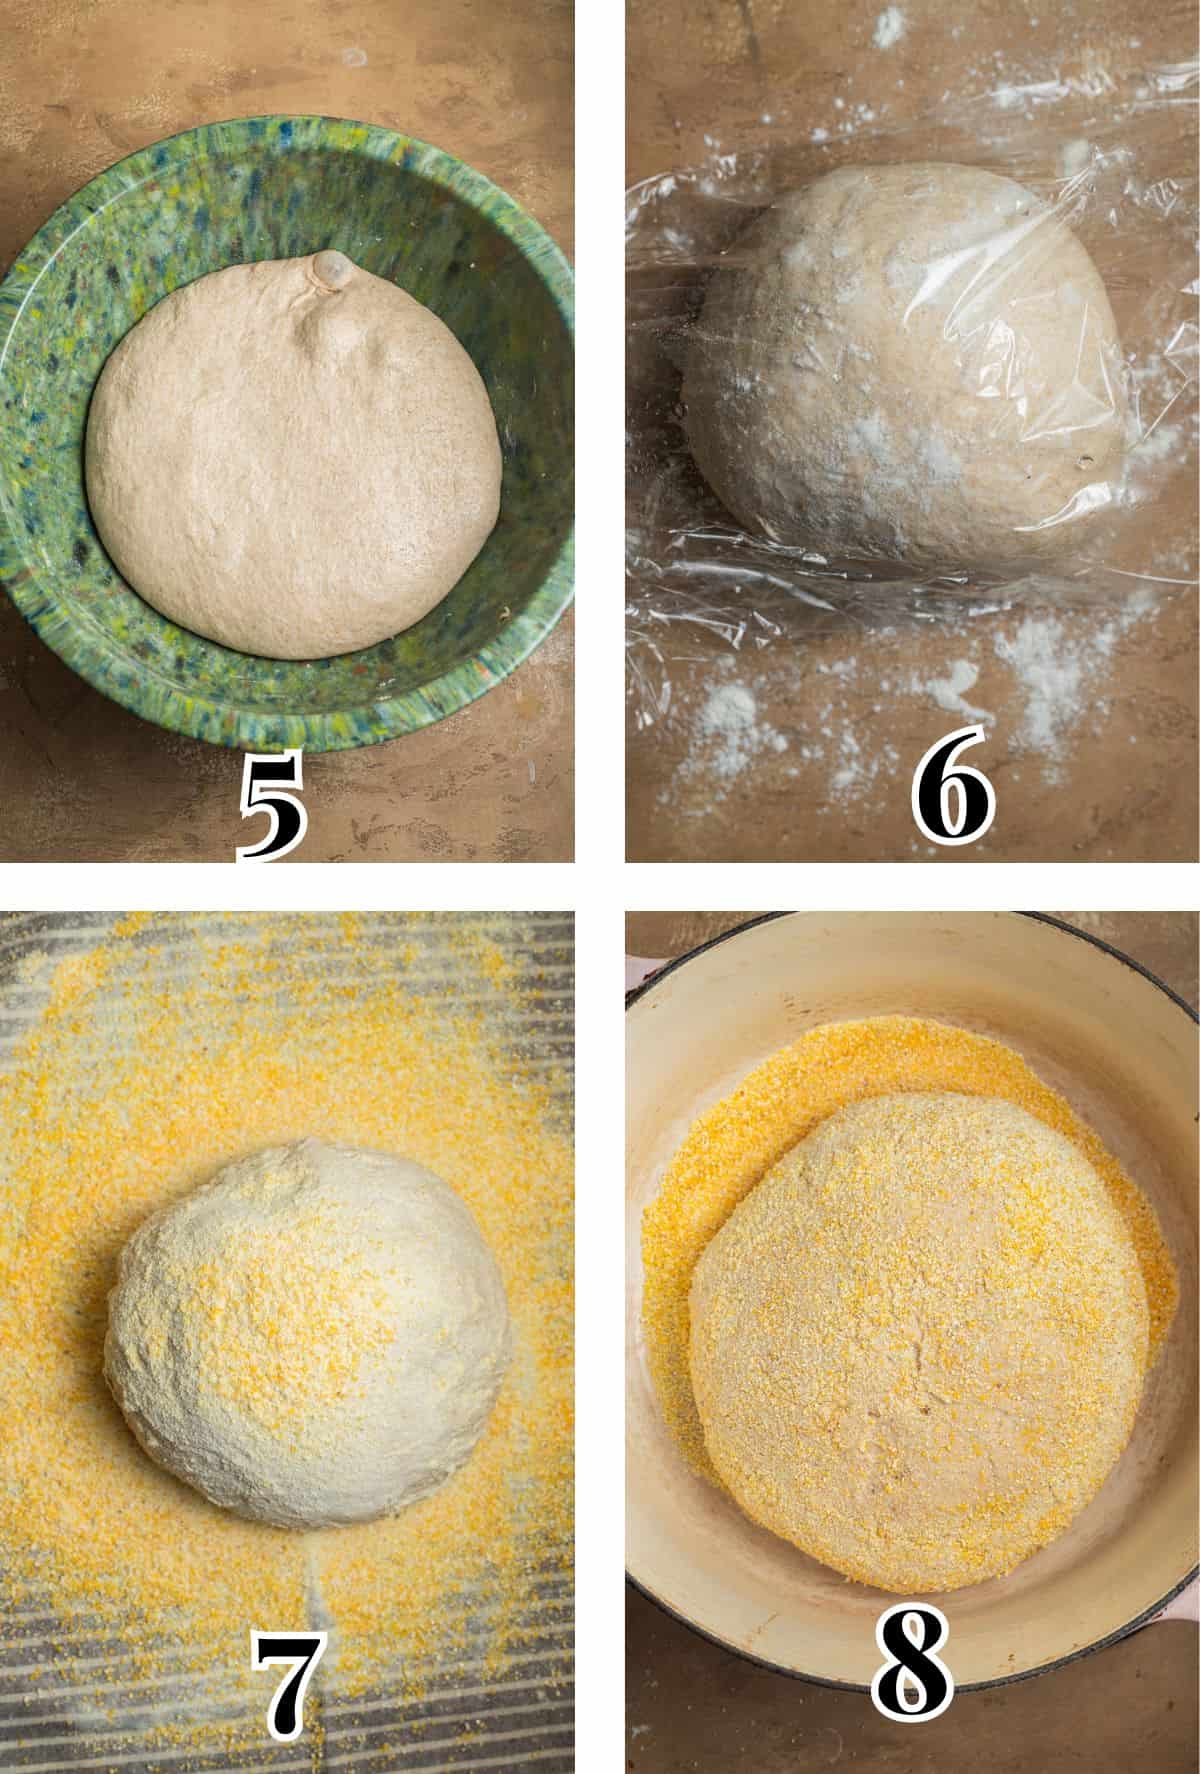
Remove dough from the fridge (Image 5). Dust a work surface with enough flour to prevent sticking, and place the dough on top, folding it over itself a couple of times. Cover and rest for 15 – 20 minutes (Image 6).
Dust a kitchen towel with cornmeal or wheat bran. Lightly flour your hands, then form the dough into a ball (video below). Place over the cornmeal, then dust the top with cornmeal (Image 7), and place another kitchen towel over it. Let rise in a warm place until proofed, about 2 hours.

TIP: Press a floured finger gently into the dough. If it slowly springs back and leaves a slight indentation, it’s ready to bake.
About 45 minutes before baking, adjust your oven racks so that there’s plenty of space for the pot. Preheat oven with the Dutch oven.
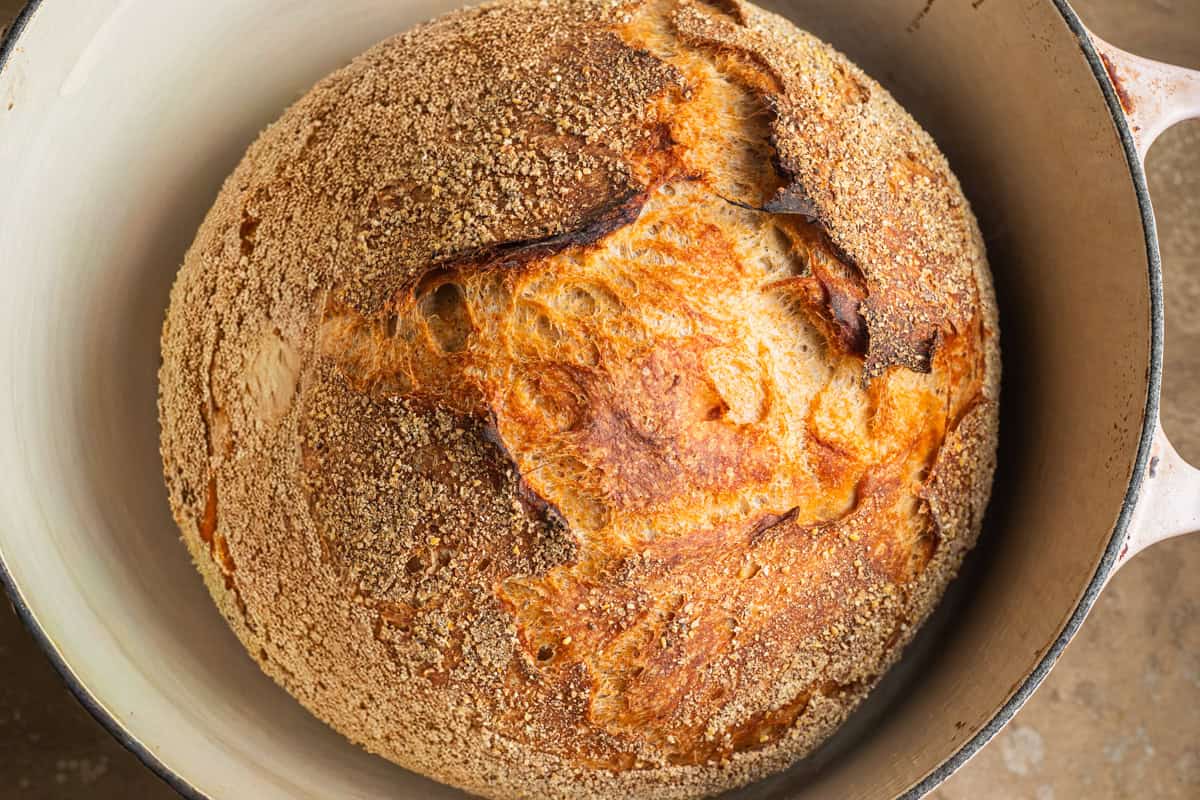
Remove the kitchen towel and remove the Dutch oven from the oven. Carefully transfer the ball of dough to the pot, seam-side up (Image 8). Bake for 30 minutes, covered, then remove the lid, and bake for another 15 – 20 minutes until deeply golden brown.
Transfer to a wire rack to cool completely, before slicing and enjoying. It’s great with my breakfast beans, barley lentil soup, or mussels marinara, or Mediterranean chickpea soup!
Recipe FAQs
Yes! Instead of a 12 – 18 hour window, I’d recommend chilling the dough for 18 – 30 hours in the fridge.
Sesame seeds, oats, pepitas, everything bagel seasoning, poppy seeds, and more all make great crust toppings. I’d recommend coating the bottom of the dough with cornmeal or wheat bran. But for the top, mist the shaped dough lightly with water and sprinkle whatever seeds you’d like before baking.
While you can make breads with 100% whole-wheat flour, this recipe has been tailored to a 50/50 blend, so I don’t recommend trying as is with all whole-wheat.
Did you try this recipe?
I would love to hear your feedback! Be sure to rate the recipe and leave a comment below.
Want to see more of my content? Add me as a trusted google source.

Whole Wheat Dutch Oven Bread
Equipment
- 5.5-Quart Dutch Oven, or larger
Ingredients
- 215 grams bread flour, plus more for shaping
- 215 grams whole wheat flour
- 9 grams kosher salt
- ¼ teaspoon instant yeast
- 345 grams water
- Cornmeal, or wheat bran
Instructions
- Mix: In a large bowl, combine 215 grams bread flour, 215 grams whole wheat flour, 9 grams kosher salt, and ¼ teaspoon instant yeast. Form a well in the center of the flour, and slowly pour in 345 grams water. Using your hands or a wooden spoon, slowly incorporate the water into the dry ingredients and continue mixing until a shaggy dough forms (no dry bits should remain).
- Rest: Cover the bowl and let rest for 20 minutes.
- Stretch and Fold: Perform four sets of stretch and folds, allowing the dough to rest covered for 5 minutes between each set. Perform each stretch and fold by gently pulling one side of the dough up and over to the opposite side. Rotate the bowl 90 degrees and repeat until you've folded all sides (for each set, you will fold the dough four times).
- Proof: Cover bowl again and let rest at room temperature for at least 12 hours up to 18 hours, or until the dough has expanded significantly and appears bubbly.
- Shape: Lightly dust a work surface with flour, and place dough on top. Fold the dough over itself a couple of times, and dust with a bit more flour. Cover with plastic wrap and let rest for about 15 minutes.Generously dust a large kitchen towel with Cornmeal or wheat bran.Uncover the plastic wrap, then quickly shape the dough into a ball, using extra flour if needed. Place the dough, seam-side down onto the cornmeal, then dust the top with more cornmeal. Cover with another kitchen towel and let rise until the the dough passes the poke test, about 2 hours.Poke Test: Press your finger into the dough; if it springs back slowly, it's ready.
- Bake: 30 minutes before the dough is ready, preheat the oven to 450℉ / 232℃ and slide a Dutch oven into the middle rack to heat up. When dough is ready, carefully remove the Dutch oven. Remove the top towel, then slide your hand under the bottom towel and flip the bread into the pot so the seam-side is up. Note: It will look like a bit of a mess at this point, but it will be fine in the end! Shake pan slightly if the dough looks uneven.Cover with the lid of the Dutch oven and bake for 30 minutes, then uncover for 15 – 30 minutes until the loaf is crusty and deeply browned.Cool completely on a wire rack before slicing and enjoying.
Notes
Nutrition
The nutritional information on this website is only an estimate and is provided for convenience and as a courtesy only. The accuracy of the nutritional information for any recipe on this site is not guaranteed.


Looks great, I’ll try this tomorrow! Did you ever try using the cold oven bake method with this recipe?
Let me know how it turns out! And no, I haven’t – I’ll have to check that out!
Cold oven bake worked great! Put on parchment paper in Dutch oven. Set oven to 450, baked covered x 40 minutes, uncovered x 20 minutes.
Oh wonderful, great to hear! I’ll have to try that next time!
Owner’s Review: The simplicity of this recipe is really what gets me! It requires very little prep time and reveals a lovely, rustic loaf perfect for sandwiches and soups.