
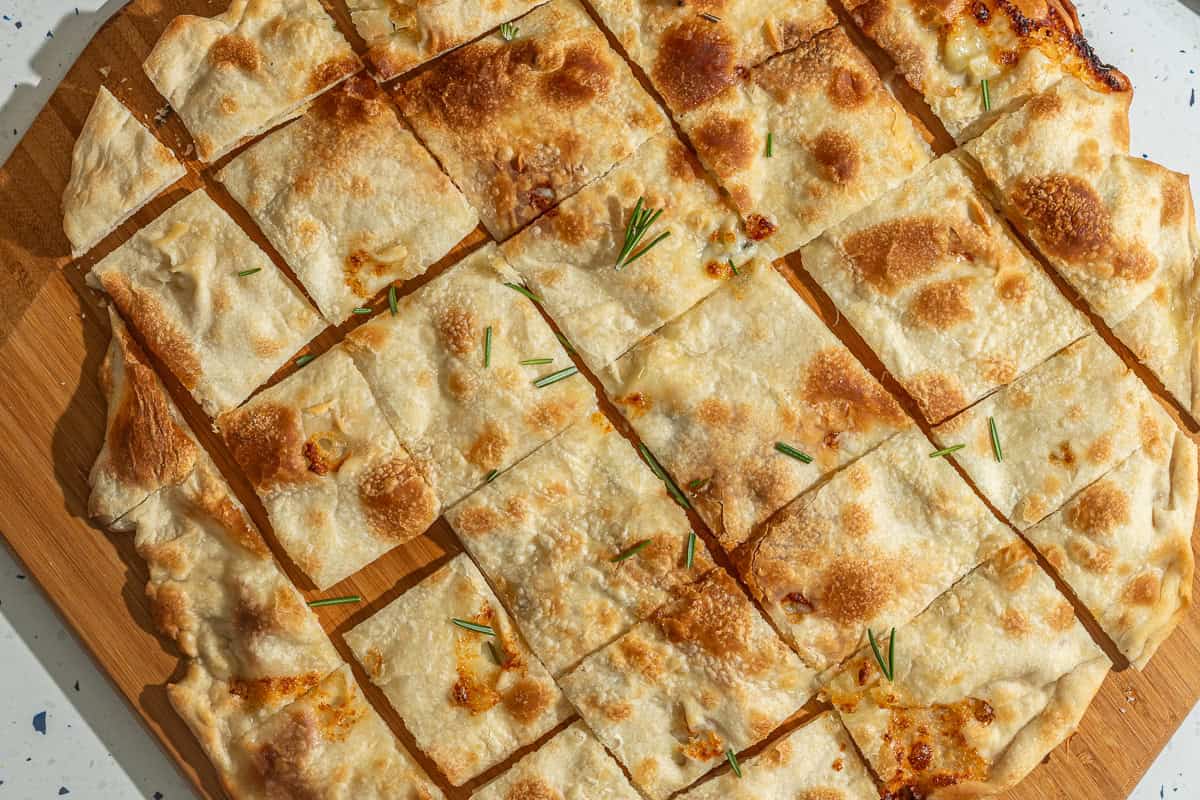
Featured in the Netflix show Salt Fat Acid Heat, Samin Nosrat’s focaccia recipe is crispy on the outside with a pillowy inside and pockets of salted olive oil. Inspired by Ligurian focaccia, it’s an ideal side dish or snack to elevate your next dinner party. Best of all, it’s an easy and delicious recipe perfect for all levels of bread bakers.

Samin’s recipe for focaccia is one of those *classic* recipes I’ve talked about with so many of my friends. Like many of you, I fell in love with her Netflix series, and when I saw the episode on ‘Fat’, I was mesmerized.
It’s one of those shows that truly shows you how incredible food can be with just a few high-quality ingredients. Olive oil, especially, contributes so much flavor and texture to bread. It’s the same approach I use in my more intermediate focaccia, a fluffy focaccia with a long fermentation process.
Why You’ll Love This Recipe
- Samin’s Ligurian focaccia has a lovely balance of a crispy exterior and a soft, moist interior. It’s well-seasoned, with little pools of olive oil and bits of flaky salt flecked throughout.
- I’ve provided step-by-step instructions (with tons of pictures and FAQs) so that you can succeed with this bread, whether you’re a beginner baker or an expert!
In addition to incorporating some key notes from her Bon Appetit video demonstration, made a few minor tweaks to the original recipe for ease and efficiency, but otherwise, it’s beautiful.
Looking for serving suggestions? Try serving this with Samin’s buttermilk chicken, lamb ragu, San Marzano pizza sauce, or baked brie with fig jam.
Ingredient Notes

While the ingredients below may seem pretty standard, it’s critical to source the best options where noted for the optimal outcome.
- Flour: Samin calls for all-purpose flour. I typically recommend King Arthur Flour for its higher protein content, which can yield a better texture in bread-baking. If this is your first time trying this recipe, I don’t recommend playing around with other flours (whole-wheat, bread flour, etc.) as it can alter the resulting crumb in a less-than-ideal way.
- Yeast: The recipe calls for active dry yeast, but you can also use an equivalent amount of instant yeast instead.
- Olive Oil: Samin stresses using your *best* extra-virgin olive oil for this focaccia, as you can taste it in the bread. If you’d like to save money, you can use everyday olive oil in the dough itself and a higher-quality option for coating and topping.
- Salt: You’ll need two types of salt: regular kosher salt and flaky sea salt. The kosher salt helps season the dough, and the flaky salt gives you pockets of salted bites for something extra special.
TIP: If necessary, you can omit the flaky salt (but make sure to still season the top of the bread before baking!)
For a full list of ingredients and their quantities, refer to the recipe card.
How to Make This Recipe
Prep the Dough:

Step 1 – In a very large bowl (the dough will expand significantly), whisk flour and salt together (Image 1).
Note: I used a 26-cup mixing bowl.
In a medium bowl, or large jar, mix lukewarm water with yeast and honey until combined (Image 2). If you’re concerned if your yeast is alive, you can wait 5 – 10 minutes to see if the liquid shows any signs of activity; otherwise, proceed to the next step.
Step 2 – Form a well in the flour, and pour in the yeast mixture and olive oil. Mix together with a rubber spatula, or your hands, making sure to scrape down the sides of the bowl, until fully combined.
It won’t be super smooth, but you shouldn’t have any dry bits remaining (Image 3).
Step 3 – Cover the bowl with plastic wrap (Image 4) and let rise at room temperature for 12 – 14 hours, or until fully doubled in size (Image 5).
TIP: I like to keep the dough in a relatively warm environment (around 70°F – 72°F). If your home is cooler or hotter, it can take more or less time.
Stretch:

Step 4 – The next day, coat a large baking sheet with a couple tablespoons of olive oil. Gently remove the dough from the pan and transfer to the sheet pan (Image 6). Cover the top with a bit more oil, and gently stretch towards the edges of the pan.
Step 5 – Continue stretching the dough every 10 – 15 minutes or so for about 30 minutes until it mostly reaches the edge of the sheet (Image 7).
Step 6 – Place the pads of your middle three fingers into the dough to form a dimple. Continue forming dimples all over the surface of the dough (Image 8).
TIP: At this point, it’s normal for the dough to resist stretching. As it continues to relax, it will become easier.
Bake:

Step 7 – Mix water and salt to create a salt brine, and pour over the whole surface (Image 9). Tilt the pan, slightly, to distribute the water evenly. Proof for an additional 45 minutes.
Step 8 – Sprinkle focaccia with flaky salt, and bake in a preheated oven for 25 – 30 minutes, or until the bottom crust is nice and golden brown. Transfer to the upper rack, and bake for an additional 5 – 8 minutes until the top is nicely browned too (Step 11).
Cool for a few minutes, then remove from the pan with a metal spatula, and transfer to a cooling rack to cool completely (or at least until it’s just barely warm, if you’re impatient like me). Slice into individual pieces, serve, and enjoy!
Expert Tips
Prep your oven: Set up your oven properly for the best success with this recipe! You’ll want one rack in the center of your oven and one in the upper third.
Baking the bread in the center allows for a nice, even heating to the top and bottom. Finishing it on top helps brown the top.
Get a nice, golden crust: For an even more golden crust, preheat the oven with a baking stone or steel (or a large, sturdy baking sheet on the center rack). Place focaccia, still in its pan, on the stone and bake.
Don’t be shy with the oil: The oil in this recipe helps to impart a delicious flavor and develop a burnished crust. Make sure to use plenty of oil to coat the bottom of the pan, or it will be more likely to stick, which can be quite messy to remove!
For best results, run a sturdy metal spatula around the pan’s edges before removing it from the pan.
Storage and Reheating Instructions

Storage: Leftover focaccia should be cut into pieces and stored in an airtight container at room temperature for 2 – 3 days.
Reheating: Day-old pieces taste best warm, so I recommend sprinkling them with just a touch of water, wrapping them in foil, and reheating them in the oven at 350°F/177°C for 5 – 10 minutes until warmed through.
Freezing: You can also freeze them for longer-term storage. To do so, wrap each piece in plastic wrap, store it in an airtight Ziploc bag, and freeze it for 1 – 2 months. Reheat using the same method as outlined above; just make sure to remove the plastic wrap first!
Recipe FAQs
This is a slower dough rise than a typical same-day recipe, but if you still don’t see any progress after several hours, it’s possibly your yeast is dead. The yeast could’ve already been dead, or you could’ve killed it if the water was too hot.
Compared to other variations, Ligurian focaccia is a thin, airy bread distinguished by its use of high-quality olive oil and a brine solution, which creates a salty, flavorful crust. The bread’s signature dimples, created by pressing into the dough, help retain the oil and brine, enhancing its rich flavor and moist texture.
The top of the bread gets a lot of color from baking on the top rack, so it may just need a few more minutes. If it’s still very pale, it’s possible your oven isn’t calibrated properly. Here’s a guide on how to properly test your oven temperature.
In theory, yes, but it’s a little complicated. Whole-wheat flour can inhibit gluten and yeast activity, yielding a denser dough, so I can’t guarantee you’ll get similar results.
But if you want to play around, go for it! I’d recommend starting with replacing just 25% of the AP flour with whole-wheat to minimize any negative outcomes.
Did you try this recipe?
I would love to hear your feedback! Be sure to rate the recipe and leave a comment below.
Want to see more of my content? Add me as a trusted google source.


Samin Nosrat’s Focaccia
Equipment
- 1 Large Mixing Bowl, at least 6 quarts
- 1 Medium Mixing Bowl
- 1 Large Baking Sheet, 13 x 18-inches
Ingredients
For the dough:
- 5 ⅓ cups all-purpose flour, not fluffed or leveled*
- 2 tablespoons Diamond Crystal Kosher salt, or 1 tablespoon fine sea salt
- 2 ½ cups lukewarm water
- ½ teaspoon active dry yeast
- 1 tablespoon honey
- ¼ cup good-quality extra-virgin olive oil, plus more for oiling the pan
- Flaky salt for finishing
For the brine:
- ⅓ cup lukewarm water
- 1 ½ teaspoons Diamond Crystal Kosher Salt
Instructions
- Mix dry ingredients: Whisk 5 ⅓ cups all-purpose flour and 2 tablespoons Diamond Crystal Kosher salt in a very large bowl.
- Mix wet ingredients: In a medium bowl, combine 2 ½ cups lukewarm water, ½ teaspoon active dry yeast, and 1 tablespoon honey. Note: If you're concerned if your yeast is alive, you can wait 5 – 10 minutes to see if the liquid shows any signs of activity; otherwise, proceed to the next step.
- Mix dough: Form a large well in the center of the flour, and pour in ¼ cup good-quality extra-virgin olive oil and the yeast mixture. Slowly begin incorporating some of the liquid into the flour, making sure to scrape down the sides of the bowl. Continue mixing until fully combined and dough is shaggy but no dry bits remain (it won't be super smooth at this point).
- Proof: Cover the bowl with plastic wrap, and let rise at room temperature for 12 – 14 hours, or until fully doubled in size. Note: I like to keep the dough in a relatively warm environment (around 70°F – 72°F). If your home is cooler or hotter, it can take more or less time.
- Stretch: The next day, oil a large baking sheet with 2 tablespoons of extra-virgin olive oil or as much needed to generously coat it.Gently transfer the dough to the baking sheet. Cover the top with a bit more oil, and stretch towards the edges of the pan, placing your fingers underneath the dough and gently stretching without tearing.Continue stretching the dough every 10 – 15 minutes or so for about 30 minutes until it mostly covers the edges of the pan. Note: At this point, it's normal for the dough to resist stretching. As it continues to relax, it will become easier.
- Make the brine: In a small bowl, whisk ⅓ cup lukewarm water and 1 ½ teaspoons Diamond Crystal Kosher Salt until the salt has fully dissolved. Pour liquid over the whole surface. Tilt the pan, carefully, to distribute the water evenly without spilling. Allow the dough to rise for another 45 minutes, or until the dough appears puffy and bubbly.
- Preheat the oven: 30 minutes before the dough is done proofing, arrange one rack in the center of the oven and one rack in the upper-third. Place a baking steel, baking stone, or large, sturdy baking sheet on the center rack. Preheat to 450°F / 232°C.Sprinkle the top of the dough all over with flaky salt.
- Bake: Bake on top of the baking steel (or stone or sheet) for 25 – 30 minutes, or until the bottom crust is nice and golden brown. Transfer to the upper rack, and bake for an additional 5 – 8 minutes until the top is nicely browned too. TIP: Use a sturdy metal spatula to lift the dough and check if the bottom is fully browned.
- Remove focaccia from the oven, and immediately brush the top with a couple tablespoons of olive oil. Cool for 5 minutes, then run the metal spatula around the edges of the pan to release the focaccia. Carefully transfer the bread to a cooling rack to cool completely (or at least until it's just barely warm, if you're impatient like me). Slice into individual pieces, serve, and enjoy!
Notes
- * The metric measurements in the original recipe list that 1 cup flour = 150g, which is the typical amount without fluffing, scooping, or leveling the flour. So don’t feel the need to do that in this recipe if measuring in cups!
- If necessary, you can omit the flaky salt (but make sure to still season the top of the bread before baking!)
- Don’t be shy with the oil: The oil in this recipe helps to impart a delicious flavor and develop a burnished crust. Make sure to use plenty of oil to coat the bottom of the pan, or it will be more likely to stick which can be quite messy to remove!
- Storage: Leftover focaccia should be cut into individual pieces and stored in an airtight container at room temperature for 2 – 3 days.
- Reheating: Day-old pieces taste best warm, so I recommend sprinkling them with just a touch of water, wrapping in foil, and reheating in the oven at 350°F/177°C for 5 – 10 minutes until warmed through.
- Freezing: You can also freeze them for longer-term storage. To do so, wrap each piece in plastic wrap, store in an airtight Ziploc bag, and freeze for 1 – 2 months. Reheat via the same method as outlined above, just make sure to remove the plastic wrap first!
Nutrition
The nutritional information on this website is only an estimate and is provided for convenience and as a courtesy only. The accuracy of the nutritional information for any recipe on this site is not guaranteed.


I tried making this recipe by dividing all the ingredients by 2. The final product turned out to be crispy from the top and bottom but under baked from inside. How can I fix it please help!
Hi Drish,
Happy to try to help. If you’re trying to fix it now, you can try baking it at a lower temperature (like 350F); wrap it in foil, and bake for 10 – 15 minutes depending on how uncooked it is.
If you’d like to try it again, can you let me know what type of pan you used and how long you baked it? Did you follow the timings/temperatures exactly? Also, do you know if you’re oven is calibrated properly? These questions can help assess what might have gone wrong!
My yeast was very active and the dough rose well, but the final product seemed flat and chewy, not light and airy as I expected. What might I have done wrong? After the second rise, it didn’t look any different. Wasn’t bubbly, as expected. The first rise was about 19 hours.
Hi Kathleen, so sorry to hear it didn’t work for you! Question: How warm is your kitchen? If it’s on the cooler side, I wonder if it just needed more time to rise the second time. Was it able to stretch fully to the outer edges of the pan? Also, what size was your pan?
Owner’s Rating: *This* is the focaccia recipe that got me in breaking bread. It’s so easy, accessible, and delicious, with simple ingredients and a lovely texture.