
Over the last several years, I’ve made my fair share of pizza at home. Throughout that time, I saw many, many failures, so I thought it’d be helpful to share my learnings. The more practice you have, the better you’ll be at making pizza but with a few key insights you’ll still be able to create something delicious from the get go!

When I first started making pizza, I thought my requirements were simple. I wanted a dough that balanced perfect chewiness and crispiness; tart, but slightly sweet tomato sauce; and milky, creamy, and slightly oozing cheese on top. And I wanted all of those elements to come together into the perfect bite.
Years later, after a lot of testing, I’ve come to a place where I feel satisfied with my recipes and techniques. As a result, I decided to create a guide so that you, too, can make great pizza!
Notes
- The goal of the guide was to create something relatively straightforward and easy, meaning a beginner can feel comfortable and confident making a delicious pizza with relatively little effort and minimal pain points along the way. As a result, this guide will only be focused on commercial yeast-based pizza dough.
- The focus of my research was on thin-crust pizza (somewhat of a hybrid between a New York slice and Neopolitan style), not Sicilian/Grandma style/Detroit/Deep Dish, etc.
- This research is based on cooking pizza in a home oven (not an outdoor wood fired oven, Ooni/Roccbox, etc.) If you do happen to have a nice pizza oven, many, but not all of these tips will still apply.

A great thin-crust pizza should have an airy crust with plenty of bubbles; it should be be slightly crispy, but also chewy.
Key Elements
Two years ago, I was on a mission. A mission to create Neopolitan pizza in my home oven. Here’s the thing — it’s just not possible. Even if you have the right dough and ingredients for the job, the reason Neopolitan pizza tastes the way it does is because it’s cooked in extremely hot wood fired ovens (800F – 1000F).
At such a high heat, these pizzas take about 60 – 90 seconds. The result is a soft, chewy and airy crust with classic leopard spotting. Because the pizza cooks so quickly, it retains a lot of moisture.
I know there are tons of recipes online that say “how to make Neopolitan pizza in a home oven!” Sorry, you can’t. However, you can make an extremely delicious pizza that has some elements of the Neopolitan style and some elements of a New York style pizza.
We’ll walk through all of the ways you can do that below!
Make a Great Crust
Let’s establish what’s necessary to get a “great” crust. For thin-crust pizza, I’m looking for a crust with a bit of chew, some solid air bubbles, a bit of crispiness, and a thin interior (thin enough that the slice droops ever so slightly but not so thin that the toppings completely fall off).
We absolutely don’t want something so crunchy that it tastes like a cracker or something dry or tough to eat.
And what about flavor? Ideally, there’s a slight tang from the fermentation (whether it’s natural or yeast-based) and the dough is salted, but not too salty. The most important thing here is that I want the dough to be good enough to almost stand by itself. I want to crave eating the crust because it’s so tasty and chewy and light.
And finally, I want the dough to be easy to work with. It should stretch nicely without tearing and take relatively little effort to form into shape.
The Right Ingredients
Most pizza recipes call for the following ingredients:
- Flour: The two best flours to use for pizza are either 00 flour/pizza flour (Antimo Caputo makes a high quality product) or regular bread flour. Both have high protein content (12%+) which is ideal for gluten formation. The “00” annotation refers to the ash content and fineness of the flour when it’s milled — 00 is the most finely milled flour in Italy. For more details, check out my guide on bread flour vs. 00 flour for pizza.
- Water
- Salt
- Yeast 2
- Olive Oil 3
2 Usually this is active dry or instant yeast. I prefer instant yeast as it does not need to be activated. See the FAQ section below for explanations on when you can use different kinds.
3 This is typically not used in true Neopolitan dough, but it’s commonly found in many home pizza recipes as it slightly increases moisture levels and can improve browning.
How to Make Great Dough
Regardless of what pizza recipe you follow, I’ve found that the following is incredibly important for homemade dough:
Autolyse
Common in bread baking, autolyse is where you mix water and flour together and let the dough sit for at least 20 minutes before you knead it. In those 20 minutes, some magical things happen – the dough begins to hydrate and gluten bonds begin to form.
Ok, but why should you care? The autolyse makes the dough softer and easier to work with and decreases the amount of kneading time!
You’ll notice that many pizza dough recipes that require kneading also require you have the dough rest before kneading. If it doesn’t require that rest period, make sure you let it rest.
What about no-knead doughs? This is where it gets interesting. A no-knead dough essentially goes through autolyse over an extended period of time.
As opposed to 20 minutes, it sits in the fridge at least overnight! However, I’d caveat that even with ample time, no-knead doughs do not create the same structure as a kneaded dough and tend to be stickier/wetter to work with.
I do not, therefore, work with no-knead doughs for any pizza that requires hand stretching.
Kneading
What does kneading do? When you first mix the dough together, two key proteins in the flour, glutenin and gliadin, are tangled up in a random arrangement.
However, when you start kneading the dough, the proteins begin to line up and form an interconnected gluten network. This gluten network is what allows your dough (or any bread, for that matter) to have a nice structure and chew.
Balling
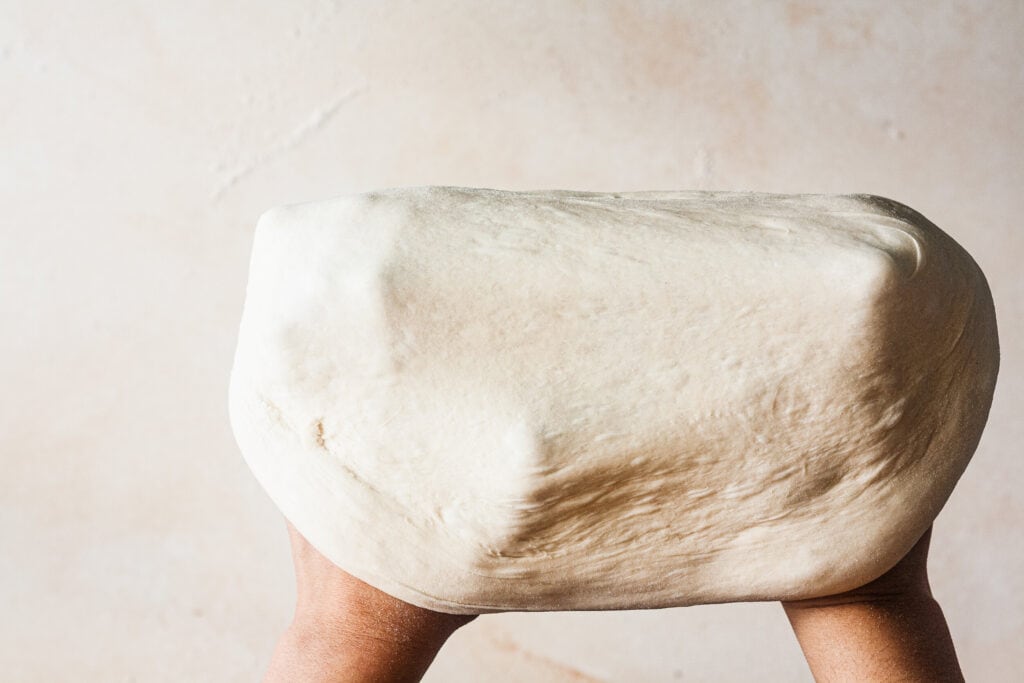
Balling your pizza dough tightly — the better you ball your pizza dough, creating tension and trapping air bubbles, the easier it’ll be to retain a circular shape and produce a bubbly pizza. I’ve provided a video below on how I ball the pizza.
Dough FAQs
Most recipes call for active dry yeast. Generally, you’ll need to activate the yeast by dissolving it in water before adding to your flour. In the last few years, commercially available active yeast allegedly does not need activation, but I recommend doing it anyways just in case.
You can easily sub instant yeast for active dry (I do this all the time!); 1 teaspoon active dry yeast = 1 teaspoon instant yeast. As a bonus, you don’t need activate it — it can be directly added to dry ingredients.
If you happen to have fresh (cake) yeast, you can use it as well. This also does not need to be activated and can be crumbled into the dry ingredients or dissolved in water if desired. To substitute for active dry yeast, add in double the amount the recipe calls for (ex: 1 teaspoon active dry yeast => 2 teaspoon fresh yeasts) If you have RapidRise yeast, you will have to be more careful. This form of yeast does not do well for longer rises and will not fare well in the fridge. I don’t recommend using this for pizza dough.
Yes, you can. It adds an amazing flavor, but keep in mind that whole wheat flour is drier so your resulting pizza dough may be denser than one made with white flour. Feel free to experiment with subbing 10% to 25% of the white flour for whole wheat to start – you can try upping the amount of water as well for a more moist dough.
To be honest, I don’t do this, but yes, you can. After the dough has risen and you’ve formed it into balls, freeze the dough balls. To use, thaw on the counter with a warm towel or oiled plastic wrap over the dough until it’s proofed and ready to be baked. Timing will depend on the amount of the dough, temperature of the room, etc. so be sure to keep an eye on it but it will likely take at least a couple hours. Note that defrosting any type of dough may change the moisture content, so it could be harder to work with.
Here’s the thing — it’s okay for a pizza dough to be sticky to the extent that you’re able to handle it. If it’s super sticky, you may want to add more flour, but if it’s just a bit sticky, don’t worry.
The key here for home oven pizza dough is making sure we work with something that doesn’t dry out in the oven. As a result, sometimes people will adjust their pizza dough recipes to have a higher hydration (a higher percentage of water to flour) than you may be used to working with. This also doesn’t mean you need a high hydration dough to make a good pizza, especially for a classic New York Style dough. Check the recipe for any notes on wetness of the dough before changing the ratios. Moisture can be good; the water in the dough creates steam which then puffs up the crust nicely.
With practice, you’ll get better at handling sticky doughs, but if it’s too sticky for you to handle you can add a little bit of flour at a time — just don’t go overboard! I like to add a bit of flour at a time on my wooden cutting board or working space. If it’s too dry? You’ll want to add a bit of water at a time until you achieve the desired texture. Remember, just a little at a time can go a long way. If you’re following a no-knead recipe, keep in mind, the dough will change immensely between mixing and when you actually form the individual balls. If you’ve just mixed the dough and it’s extremely wet, don’t worry about it.
You can be flexible here depending on what you have at home, but always make sure to oil your container before putting the dough in.
For equipment: For a small batch, I prefer just re-using a plastic takeout/deli container or Tupperware with its lid to ensure it’s airtight. Or a rimmed baking sheet with plastic wrap. Or a 9×13 pan for keeping multiple dough balls with plastic wrap.
For larger batches, you can buy a dough box with its lid.
Sauces and Toppings

Ok, enough science for now. Sauce making is where you can really use your creativity to produce something delicious!
A few tips before we go through some examples:
- You need way less sauce than you think. At Roberta’s, they only use about 2-3 tablespoons of tomato sauce for a 12” pie. If you have too much sauce, your crust will get soggy (or worse, the pizza will completely collapse). Remember, this is a thin-crust pizza so there’s less dough to hold the sauce and toppings.
- For a classic pie, keep it simple. For a tomato sauce, just a bit of olive and salt is all you need. I’ve got a great recipe for San Marzano pizza sauce that’s quick and easy! Add some garlic if you’d like, but you don’t need much.
- Once your dough has been formed into a circle and is ready for the sauce, take a small ladle or spoon and place the sauce into the center of the pie. Using the flat part of the ladle or spoon, spread the sauce around the pie, starting in the center and making larger and larger concentric circles until you reach the crust.
- Like the sauce, go easy on the toppings. If your pizza is too heavy, it’ll be hard to slip it off the pizza peel, and it may make your dough soggy.
- Where it makes sense, you may want to pre-cook some of your toppings and/or drain any watery toppings. You can remove some of the excess water from toppings like fresh mozzarella or raw tomato by wrapping or pressing them gently with a paper towel. Make sure to pre-cook any raw meats (ground meat, chicken, etc.) — it likely won’t have time to cook fully in the oven.
- Experiment with setting aside a small portion of your fresh mozzarella to add towards the end of cooking (1 minute before the pizza is completely cooked) to get both concentrated and evenly dispersed areas of cheese. In the image below, you can see the white areas of concentrated mozzarella in addition to the more dispersed cheese where the oil has separated.
Equipment
Let’s talk equipment.
What is the best tool for cooking the pizza?
Generally, with home pizza making you have the following options:
- Baking sheet
- Cast-iron skillet
- Non-stick circular pizza pan
- Baking stone
- Baking steel
So, which is the best? You can make it work with any of the above, but for a thin-crust pizza, I prefer a baking steel. As Cook’s Illustrated points out, a baking steel cooks 30% faster than a stone.
They even recommend the stone + steel combination as optimal, where you put the baking steel on top of the stone to retain heat longer. One other note about stones to keep in mind is that it’s more prevalent to cracking and as a result, doesn’t last as long as the steel.
What about a cast iron pan?
If you don’t have a baking steel or stone, a cast iron pan is a good next choice. There’s so many recipes catered to a cast iron like the skillet-broiler method — even turning the cast iron upside down and sliding your pizza onto the base works well too.
I don’t have any fancy equipment for baking my pizza. I just have a baking sheet. Can I still make good pizza?
Yes, definitely! Use the largest baking sheet you have and place it upside down in the oven.
What other tools are useful for pizza making?
- To me, the single most important tool is a kitchen scale. It is incredibly important that you’re able to make the dough based on a particular ratio. Cup measures are not accurate, but scales are. You can get a cheap scale. Invest in it, and use it for breads and other desserts. Most worthwhile purchase I’ve made.
- A bench scraper for getting any sticky bits of the dough off a cutting board or workspace.
- A pizza peel is really helpful for launching the dough into the oven. It takes a bit of practice, but once you’ve gotten used to it, it’s hard to use anything else. If you’re not ready to take the plunge, you can build your pizza on parchment paper and transfer the parchment to the oven.
For all of these options, make sure to preheat the pan, stone, or steel when you’re preheating the oven, so that it stays as hot as possible.
Step-by-Step Instructions


You’ve made your dough, you’ve got your toppings ready. Now onto the baking!
- Let the dough come to room temperature.
Unless otherwise stated by the recipe, take your dough out of the fridge prior to baking. For a 3-5 day cold-fermented dough, I like to take it out of the fridge anywhere from 2 – 5 hours (depending on the recipe) before baking to allow the dough to rise again.
For a faster 24 hour dough, I find it will usually come to room temperature within 30 – 45 minutes. The key here is making sure your dough is at room temperature before forming the pizza if you want it to get a good rise. Preheat and arrange oven racks to prepare for baking.
There are two main methods of cooking your pizza in the oven. I recommend trying both and seeing which method produces the best pizza for you.
Regardless of which method you choose, preheat your oven with your baking tool of choice inside at least 45 minutes before baking at the hottest temperature it goes. THIS STEP IS CRITICAL as it ensures the oven stays as hot as possible so that the pizza cooks faster and doesn’t dry out.- Top rack versus switching racks methods
Top rack method: For this method, put your baking tool of choice (steel, stone, baking sheet, cast iron) on the top rack of your oven. The top rack should be about 5-6 inches from the broiler. If your broiler is weak, you can move the top rack to be 2-3 inches from the broiler.
Once you’re ready to form your pizza, switch the oven to the broil setting to preheat the broiler. When you’re ready to launch your pizza, you’ll broil it for 2 minutes, then turn off the broiler but keep the oven on at the hottest temperature until the pizza is finished cooking (an additional 1-2 minutes).
Switching racks method: Put your baking tool of choice on the middle rack of your oven, and arrange your top rack so that it is 5-6 inches from the broiler. When you’re ready to launch your pizza, it’ll cook at the oven’s hottest temperature for 3-4 minutes until the bottom is browned on the middle rack. Then, you’ll turn the broiler on and transfer the pizza to the top rack to finish cooking for ~1-2 minutes. - Start forming the pizza
Once your dough has come to room temperature, you’re ready to form the pizza. If using a pizza peel, flour the peel with semolina or AP flour. Carefully pick up the dough from its container and place onto the pizza peel (avoid degassing the dough as much as possible).
Flour the top and bottom of the dough. You don’t want the dough to stick to the peel. You can check that it’s not sticking by sliding the dough around the peel. If it is sticking, add a bit more flour to the bottom.
I like to do this every minute or so to ensure my dough is not sticking, especially once I start adding the sauce and toppings.If you don’t have a peel, you can put the dough on a piece of parchment and follow a similar procedure, flouring the parchment so that you can easily lift the dough to stretch later.
Form a rim for the crust by gently pressing your index finger around the perimeter of the dough, about ⅔” from the edge as shown in the examples below. - Stretch the dough
Once the rim has been formed, be careful not to deflate the outer edges, as this is what’s going to create the characteristic risen crust in the oven. To stretch the dough, there are two methods I recommend.
Lift and stretch. Lift the dough and place your knuckles on the inside rim of the dough. Let the dough gently stretch by rotating your knuckles in a circle until it reaches the desired diameter.
Triangle stretch. With the dough on the peel or parchment, make a triangle with both your index fingers and your thumbs and gently push outwards. Keep turning the dough and pushing outwards until you’ve stretched the whole dough (see below for my hand formation). - Add your base sauce (tomato sauce, olive oil, cream) using a ladle.
- Top the pizza with desired toppings.
- Launch!
If using a pizza peel, make sure the pizza is not sticking to the peel before launching. If it is, add a bit more flour, then hold the handle of the peel and slide the dough around to ensure it’s not sticking at all.
To launch, hold the peel parallel to your baking sheet/stone/steel and gently slide the pizza onto it. There’s no need to rush it; you can do this slowly to get the hang of it. Immediately close the oven and cook according to your desired method. If using parchment, carefully move the dough with parchment onto the baking surface of choice.
If you’re having trouble picking it up, you can slide it onto a cutting board and gently slide the parchment off the cutting board into the oven.
Note: Parchment paper will start to toast in the oven. It will be totally fine as long as the paper is a few inches from the broiler and there isn’t a large overhang, as the parchment can curl up and burn. I recommend trimming the parchment paper so that it’s only about 1 – 2” larger than the pizza itself to prevent any premature burning.
Regardless of what methods or tools you have, you may notice your pizza doesn’t cook perfectly evenly, especially with the broiler. Feel free to rotate the pizza 180 degrees halfway through the cooking process to ensure even charring.
Pizza FAQ
My dough was difficult to stretch and/or tore. What happened?
- Your dough likely didn’t have enough time to rest and relax after taking it out of the fridge. It needs more time to proof and come to room temperature. In this case, it may feel quite cold. If it tore, it could be as a result of the former, or not having kneaded it enough to create a strong enough dough.
My pizza didn’t slide off the peel cleanly and now it’s made a mess in my oven. What can I do?
- If the dough has folded over itself, you can quickly (and carefully!) try to unfold it and rearrange the toppings to clean it up. If it’s too late for that, you can always fold the dough in half to make a calzone. Remember, it will still taste delicious!
The bottom of my dough is still quite pale. What did I do wrong?
- This could happen for a number of reasons. It’s possible you didn’t preheat your oven for long enough or your baking tool isn’t hot enough to brown the pizza (did you remember to preheat the baking tool in the oven, too?). Is your oven on at the highest temperature possible?
The outer crust of my pizza is still quite pale. What did I do wrong?
- First, ensure you were successfully able to locate your broiler. Do you see a flame or an orange electric coil at the top of your oven when you turn the broiler on? If not, it’s possible you have a bottom drawer broiler! I’ve actually been able to help two people discover this through my cooking classes — if you turn the oven on and notice the bottom drawer of your oven gets hot and/or see a flame, that means your broiler is at the bottom of your oven!
- It’s possible your broiler isn’t hot enough. Ensure it’s on ‘HI’ — if it is, try broiling your pizza for 1 – 2 minutes longer but make sure the crust isn’t drying out. Keep in mind, the more gas bubbles you have in the crust, the more likely you’ll see those bubbles char. You may want to try a 3 day fermentation for a more charred crust.
- Some recipes call for additional ingredients such as sugar, milk, or diastatic malt powder that help increase browning of the crust. Feel free to experiment with them if you’d like. You can add a teaspoon or so of sugar into a 12” dough ball, substitute 10-20% of the water in the dough for milk, or ½ to 1 teaspoon of malt powder per cup of flour.
How do I adapt this recipe if I have a bottom broiler?
- For a bottom drawer broiler, use the switching racks method (stated above). After you’ve browned the bottom of your crust in your normal oven, transfer your pizza to the bottom drawer and broil for 1-2 minutes until the top is bubbly and browned.
My pizza came out wet and soggy! What went wrong?
- More than likely you added too much sauce and/or wet toppings, such as cheese. Try adding less the next time or draining some of the liquid from your toppings before adding to the pizza.
My pizza came out dry and crackery! What went wrong?
- This could be for a number of reasons 1) the pizza was in the oven too long or 2) the pizza dough didn’t rise properly, especially if you notice if it’s extremely flat or there’s no sign of gas bubbles. Make sure you’re gentle with the dough as you’re forming it to ensure you’re not deflating the gas bubbles. Otherwise, I’d try a longer, cold fermentation method.
Recipes
If you’ve made it this far through the guide, I commend you! Below, I’ve listed a few of my favorite pizza dough recipes. I hope you enjoy, and remember this is meant to be a fun learning process!
- The dough for beginners: Roberta’s Pizza Dough Recipe. This is a fantastic dough recipe, adapted from Roberta’s Pizza in Brooklyn, NY. It is simple and straightforward for beginners, and has a nice thin-crust texture.
- My Go-To Pizza Dough (for Intermediate Pizza Makers): With this cold fermented pizza dough recipe, the slow, colder fermentation from letting the dough sit in the fridge for at least 24 hours allows for a better flavor to develop over time. That additional time also enables more bubbly goodness when baked. This recipe is flexible — it works with different flours, different times in the fridge. Use it to your advantage to play around and experiment and see what you like best.
- The Baking Steel 72 hour dough: A very close competitor to dough #2. Extremely delicious, soft, and chewy. Check out this 72 hour dough recipe.
I recommend trying out all three doughs and seeing what you like the most!


I’ve made pizza a number of times based on this guide (and Karishma’s cooking class), and the pizza I’ve been able to make is hands down some of the best pizza I’ve ever had (even compared to what you can get at artisanal pizza joints). Thanks for the awesome guide Karishma!
Such an awesome guide Karishma! Thanks for sharing this with us, it’s invaluable. Loved everything, from the tricks and tips to the topping ideas.
Can’t wait to put some of your tips around shaping and baking into practice!
Thank you Paula! So glad the tips were useful.
Thank you for this detailed guide! 🙂
Hope it helps!